Air-Layering Techniques for Conservation of Rhododendrons and Azaleas
Some thoughts and suggestions for air-layering old, difficult-to-root, or storm-damaged plants
By: John M. Hammond, Past-President, Scottish Rhododendron Society
Contents:
- Introduction
- Basic Requirements
- Branch Selection
- Preparation of the polythene wrapper
- Preparation of the Growing Medium
- Wounding the Branch
- Putting the Wrapper in Place
- Securing the Air Layer
- Allow Sufficient Time for the Layer to Grow Roots
- Maintenance
- Unwrapping the Air Layer
- Severing and Growing-on the Air Layer
- Using Air Layering for Conservation Purposes
- Conclusion
- Frequently Asked Questions
Introduction: This is a basic summary of a significantly more detailed presentation on the technique of air-layering. Many commentators have suggested that air-layering does not work, or at best the results are generally poor; however, I remain unconvinced that some of these commentators have actually carried out air-layering themselves, or have done other than trial run, as their comments and approach do not appear to add up to a viable methodology. The results that I have achieved over a long number of years have been good and the success rate is better than 90%. Given that the methodology is one of the oldest techniques of vegetative propagation and was successfully used in China more than 4000 years ago, this should not be a surprise.
In reality, the technique has to perform well in the ‘real world’ away from the author’s garden. At the time of writing the technique is going through a second phase of field trials at remote locations in Scotland where the air-layers are left to their own devices for a year or more without receiving any attention. In the first trial a total of 20 layers were installed on plants in an Argyll garden on Scotland’s West Coast, and the success rate was 85%. There were 4 layers lost due to external causes beyond my control. A second trial of 20 air-layers also achieved good results, raising the overall success rate to around 95%. A further trial of 20 layers is currently two years into generating roots. This is six hours driving time away from my home on a good day; so, there is little, if any, opportunity for regular monitoring and interference!
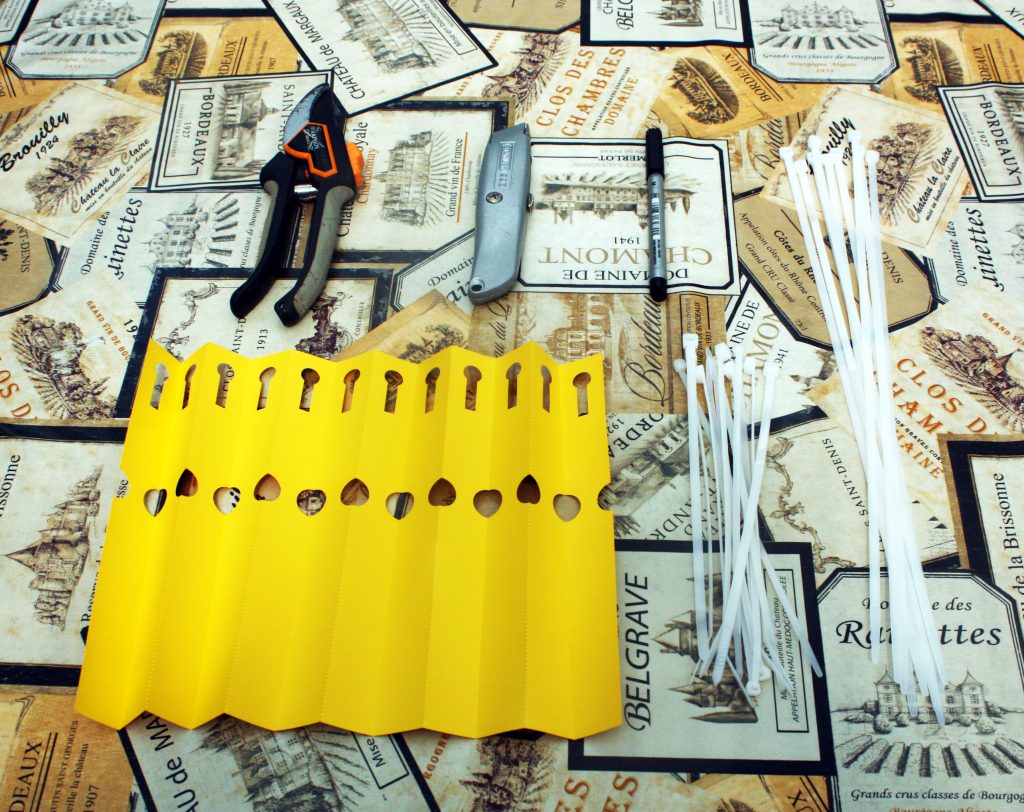
1. Basic Requirements: This is very simple, straightforward technique that any enthusiast or horticulturalist can use, so let’s begin by discussing the tools and materials required. Very few tools are needed; a pair of clean secateurs, a clean sharp knife, a permanent felt-tipped pen, a few loop-labels, and both long and short cable ties. Very few materials are required; a supply of damp sphagnum moss, a supply of fine/medium chopped bark, a black polythene heavy-duty refuse sack [cleanliness counts, always use a new bag] and a two-gallon bucket. And, what you also need plenty of is a commodity that is not often readily available . . . . patience! Getting prepared is a straightforward process that only takes a few minutes. And, it only takes a few minutes to complete each air-layer once you are familiar with the methodology.
2. Branch Selection: Whilst air-layering is a relatively simple process, in my experience there are a number of pitfalls that need to be avoided if any degree of success is to be achieved. At the outset it is important to choose a branch, rather than a twig, to layer. I usually select as upright a branch as is practicable; 18 to 24 inches [45 to 60 cm] long, branched in two or three places and it also needs to be sturdy enough to support the layering materials. It is preferable to choose a branch that is out of full sun, not only to keep the layer a more even temperature, but to prevent the medium inside the wrapper from completely drying out. In overall terms the layering materials need to as lightweight as practicable. Choosing too small a branch inevitably means that the branch is under stress throughout the layering process and some form of support is required; it also leads to a very small root-ball that does not have much of a chance in life when the branch is severed and potted-on.
3. Preparation of the Polythene Wrapper: Roll out the heavy-duty black polythene refuse-sack and, leaving the sack itself un-opened, make three approximately 11 inch [27 cm] wide double-thickness strips by cutting directly across the sack. Note: Avoid the use of large clear plastic sandwich bags for wrappers, or other clear/translucent plastic material, as excluding light from the wounded branch is extremely important when encouraging roots to start growing. We are aiming to replicate conditions underground and a double-thickness black polythene wrapper is ideal in this regard.
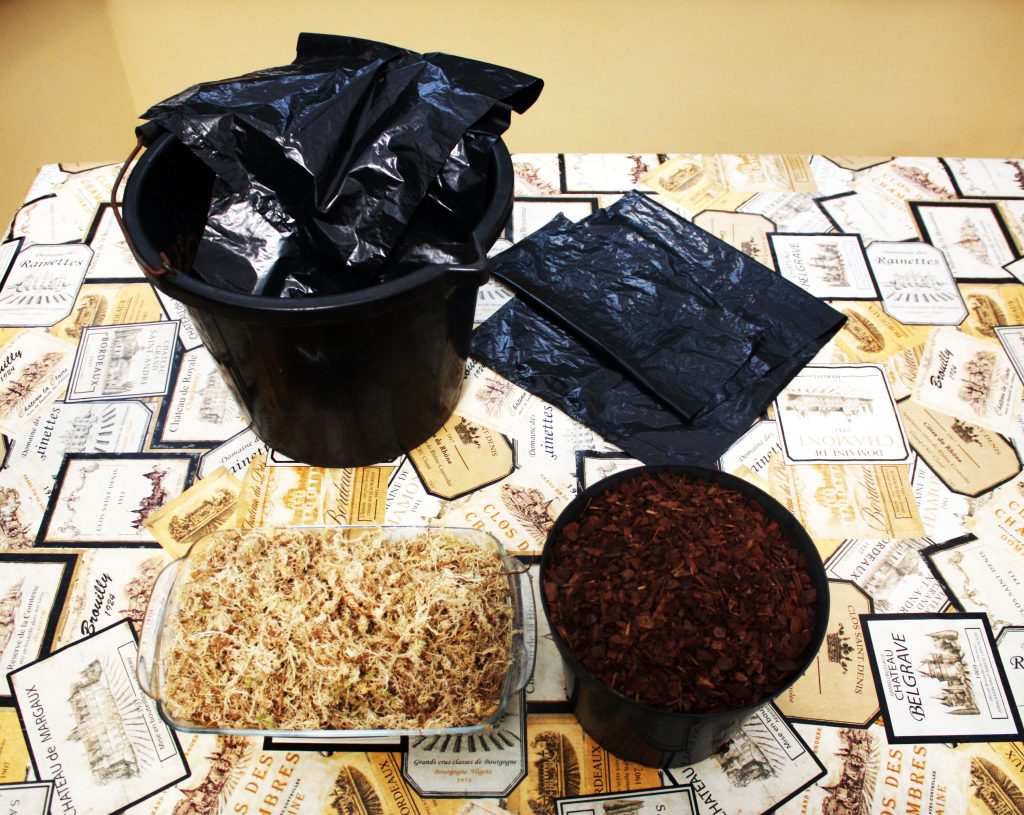
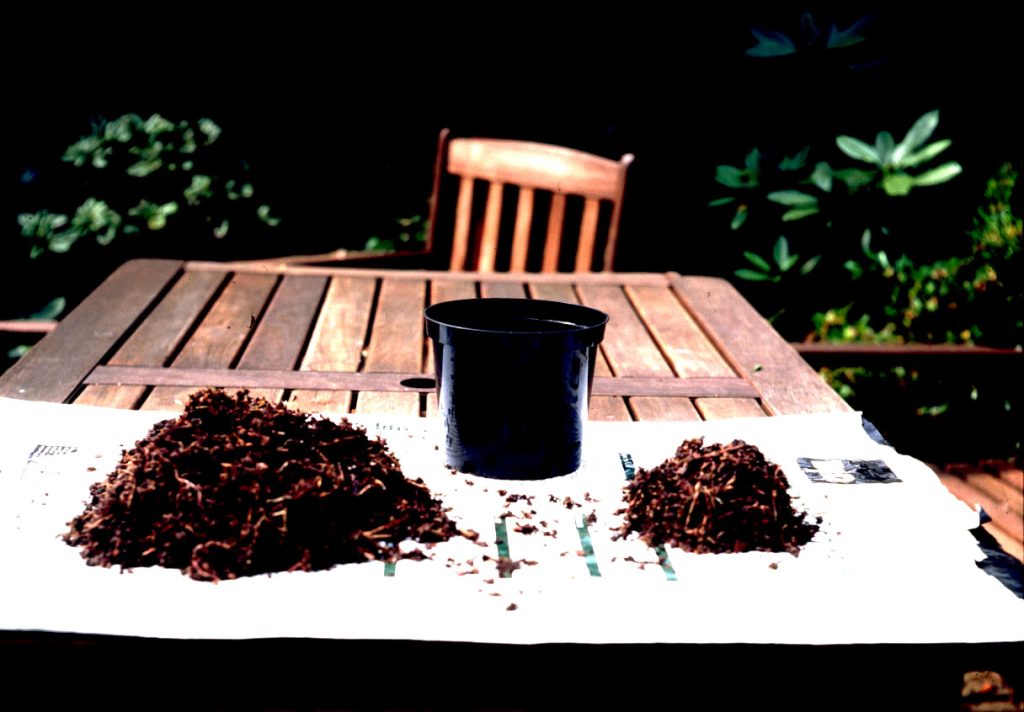
4. Preparation of the Growing Medium: Chop up a sufficient quantity of live sphagnum moss to loosely fill two-thirds of a two-gallon bucket. I find the wife’s Kenwood Chef liquidiser is very good for this task! Take one-third of a two-gallon bucket of medium or fine chopped bark and thoroughly mix together with the sphagnum moss. Add water to the mix until it is relatively wet. This volume of mix will provide sufficient medium for several air-layers. Avoid using sphagnum moss by itself as this leads to the plant generating what are sometimes called “water-roots” [fine white roots that are soft and easily broken] as it can be problematic getting these established and thriving in soil at a later stage in the process [sometimes referred to as ‘interface’].
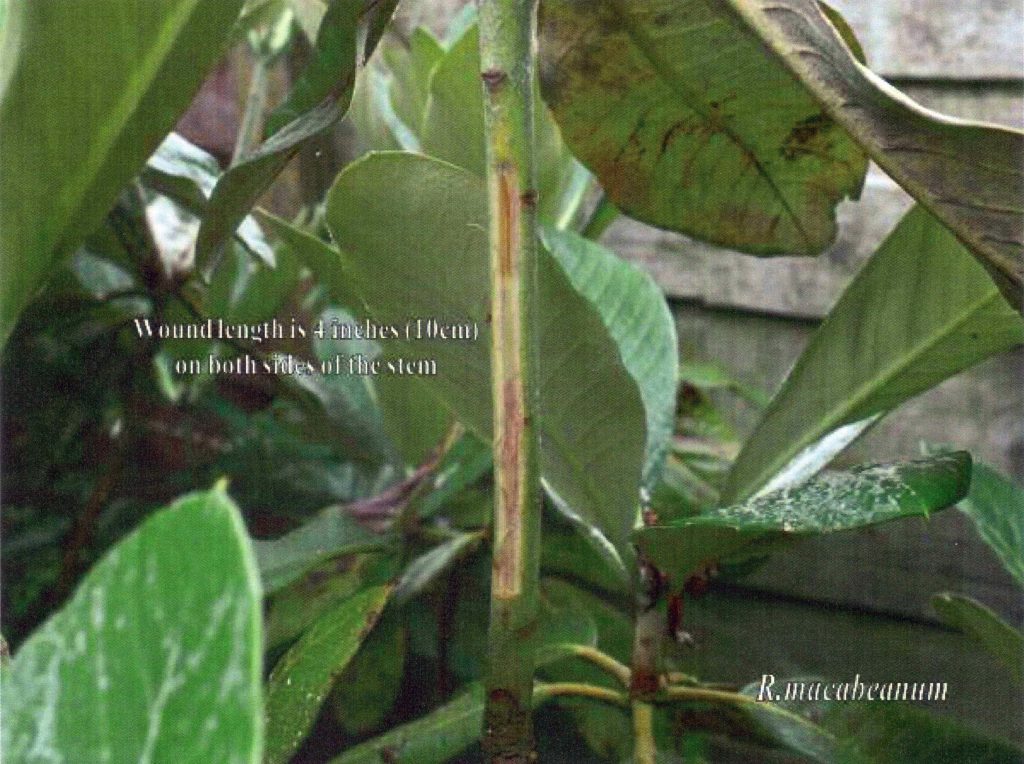
5. Wounding the Branch: It is time to wound the selected branch in the area that the wrapper will be applied. I have experimented with four different types of wound and each has been successful. However, my time-tested method is to cut a 3 to 4 inch [10 cm] long wound on both sides of the stem to expose the cambium layer. Completely remove the tongue that you have cut, as this will give the wounded area a better chance of rooting.
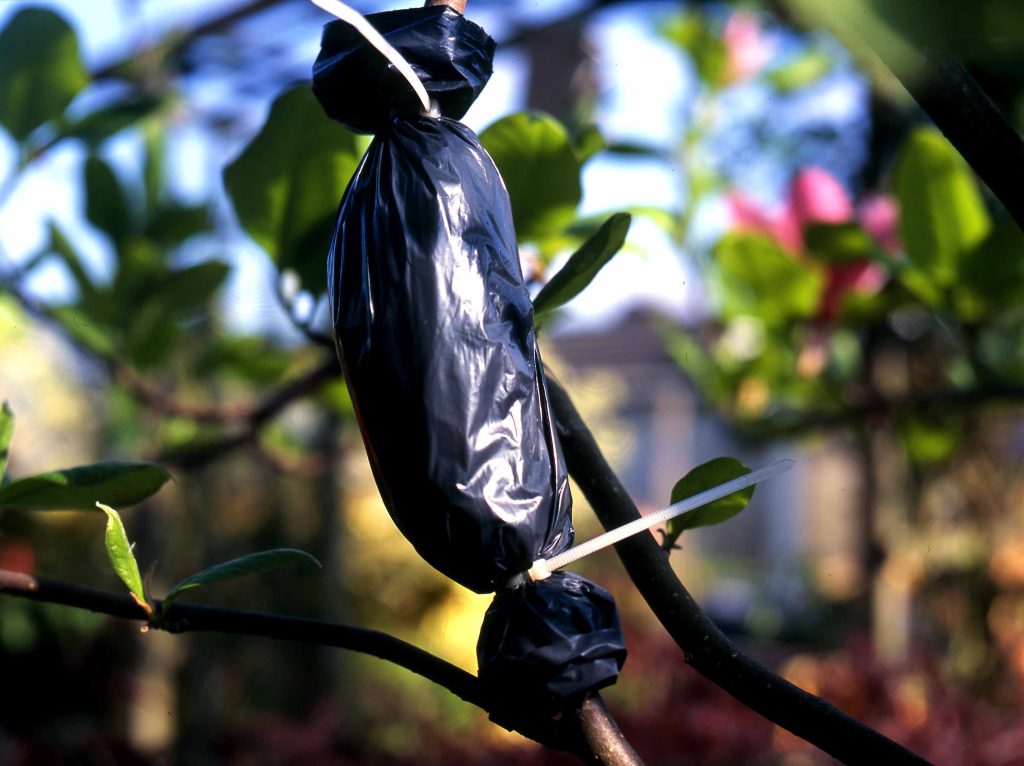
6. Putting the Wrapper in Place: It is now time to put the wrapper in place. What we are seeking to achieve is a wrapper that looks like an enlarged Christmas cracker rather than a ball! So, keep it in mind that we are forming a cylinder, which will be secured at each end with a plastic cable tie. The cable ties need to be placed 1.5 inches [4 cm] in from each end of the wrapper.
Take a large handful of the sphagnum moss and bark mix [around one litre]; this needs to be wet but not completely saturated, so squeeze out any surplus water. With one hand form the mix into a cylinder around the wounded area of the branch, then with the other hand wrap it securely in place with the black polythene to create a tube. Avoid wrapping the mix too tightly as it is important that the mix remains wet, but it is equally important not to leave any large air pockets inside the wrapper once it has been sealed. Fix a plastic table tie securely 1.5 inches [4 cm] from lower end of the wrapper as this will prevent part of the mix from falling out of the wrapper, then check that the tie has secured the wrapper in place on the branch. Next, secure the top of the wrapper with a cable tie, then open-up the loose ends of the wrapper so that the finished product looks like a Christmas Cracker.
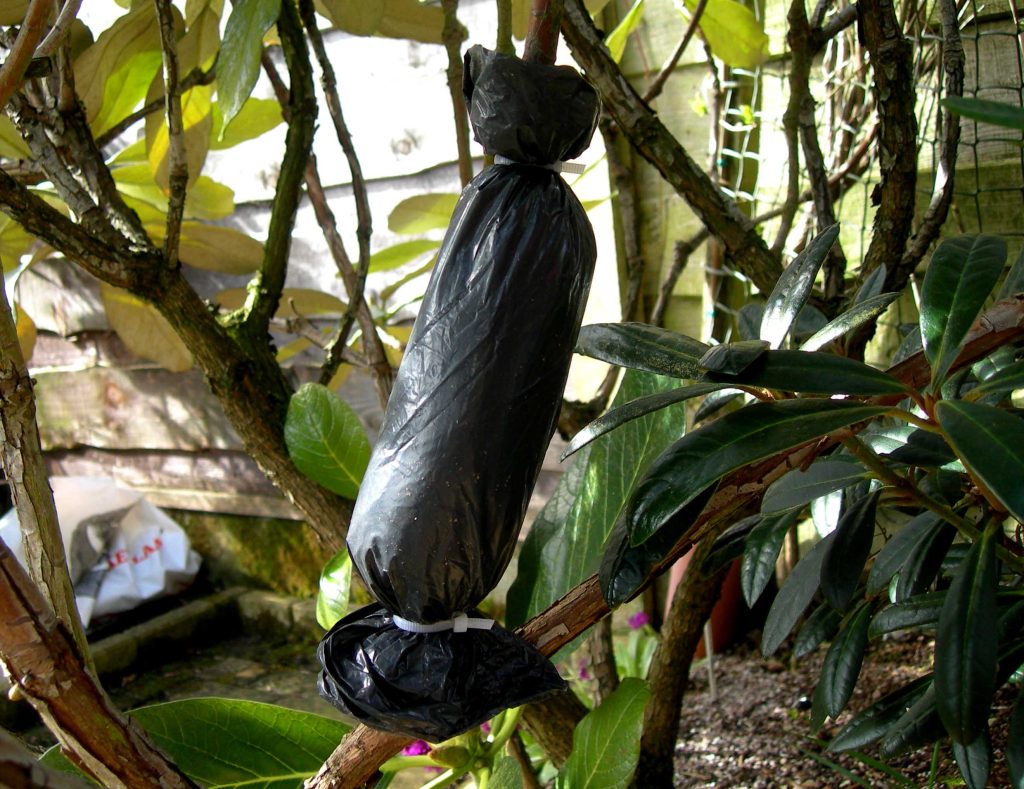
Do not over-tighten the cable tie at either end of the wrapper, as it is important not to damage the bark. We are not seeking to make the layer air-tight, we just need to hold the wrapper securely in place. Contrary to the suggestions in some publications, it is not possible to create an air-tight seal by tightly wrapping tape or a tie around the branch of a plant. Tightly bound tape can lead to infection and rotting, whilst any ‘ringing’ of the bark caused by the tie being too tight is counter-productive and the branch will tend to die slowly before the layer has formed roots of its own. In practice, we need the upper end of the wrapper to be opened out to act as a rain collector to irrigate the layer; then we need the lower end of the wrapper to act as a drain and allow any surplus moisture, together with any salts generated during root production, to gradually leach away. Although the cable tie is tight it should still be able to be rotated when a little pressure is applied.
7. Securing the Air Layer: If the main branch tends to bend significantly under the weight of the air layer, or if the branch is likely to be blown around in windy or stormy weather, then secure the air layered branch another adjacent branch with a couple of long cable ties. Alternatively, if the air-layered branch is sufficiently low enough to the ground then, immediately below the branch, push a tall, thick bamboo cane well into the soil and secure the branch to it with a couple of cable ties.
8. Allow Sufficient Time for the Layer to Grow Roots: So, here comes the difficult bit! Leave the air-layers undisturbed for at least three full growing seasons, as recommended by the old traditional Head Gardeners. There are no exceptions to this rule. This really is a case of ‘patience is a virtue’. So, this is where many gardeners tend to fail, as their curiosity wins out. They have a look to see whether any progress is being made, and they break-off the very fragile root system before it has had time to mature.
9. Maintenance: Little maintenance is required, other than an occasional check to see that the cable ties are not too tight. Also find time to pour a small amount of water into the top of the wrapper if there is a long dry spell of weather or a drought. Remember that the air layered branch will continue to grow over the three-year period that the roots are being formed, so the branch will get significantly thicker as the months pass. Sometimes, if the cable tie is under extreme pressure it will snap, other times the leaves will start to droop, then die. I usually replace the cable ties, if they are tight, each Spring to reduce the possibility of the cable tie ‘ringing’ the bark. This only takes a few minutes for a large number of layers, so it is not a time-consuming chore.
10. Unwrapping the Air Layer: After three full growth seasons lightly squeeze the body of the air-layer. If the body still feels soft and pliable, then leave it for another year to grow. If the body feels hard and firm, then the cut the cable ties and carefully unwrap the black polythene taking care to support the new roots. Often the roots will grow partway into the layers of the polythene wrapper, so be aware of this and carefully release the thin brown roots as they tend to cling to the wrapper. If there are only a few roots, or the roots are immature, then re-wrap the layer, fit new cable ties, and leave it in-situ for a further year.
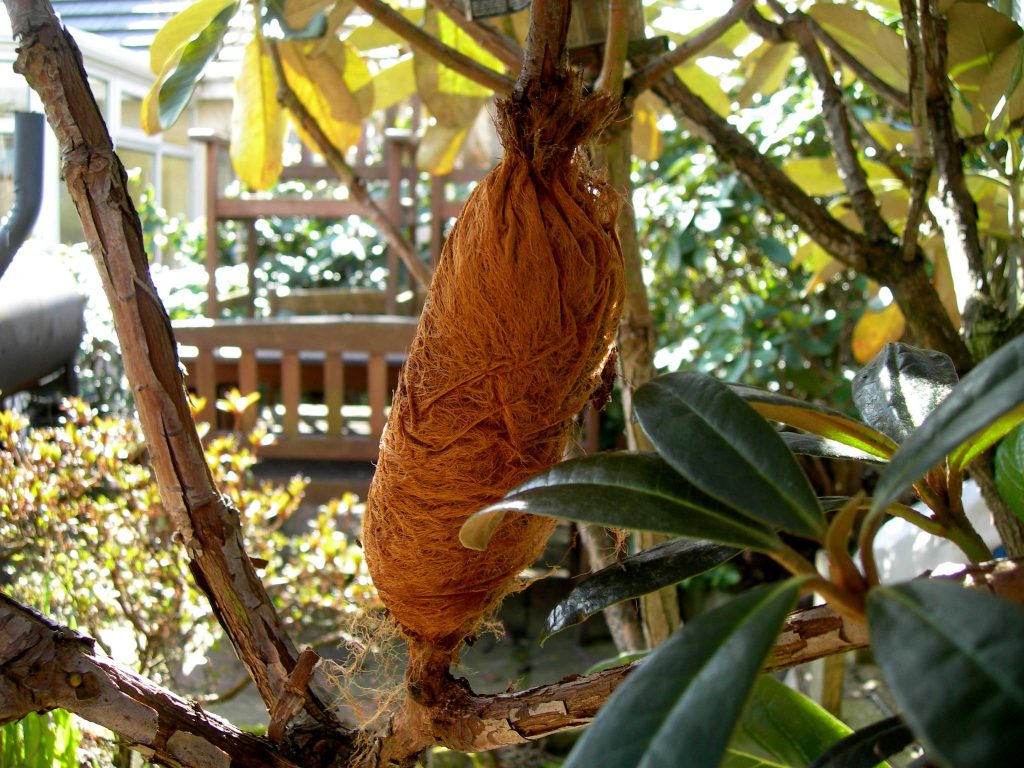
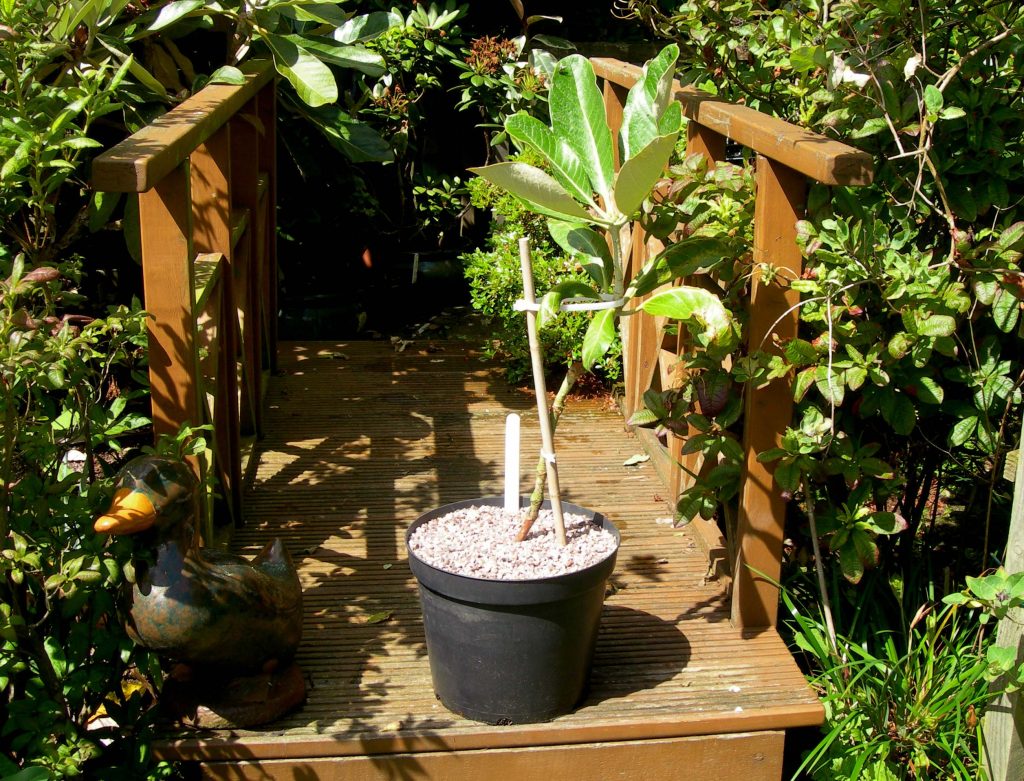
11. Severing and Growing-on the Air Layer: If the roots are mature then sever the rooted branch with a diagonal cut about 1 inch [3 cm] below the roots. Carefully tease and spread out the roots slightly, taking care not to damage any of the root system, then plant in a wide 10 litre plastic container. Position the bottom of the stem of the new plant against one side of the container, then hold the plant in place slightly diagonally so, as the container is filled, the upper part of the stem is centrally located in the container when it exits the soil in the completely-filled pot. Get a piece of bamboo cane and insert this in the soil so it runs diagonally across the container and secure the main branch of the new plant to it with a cable tie; much in the same way as you would secure a newly planted young tree with a cross-stake. To minimise the ‘shock’ to the layer and ‘interface’ problems with the compost, grow it on in pure fine/medium chopped bark, as this is a relatively open and was a natural medium that was one of the main components of the “mix” in which the layer rooted. Then place the container in the shaded area of a cool greenhouse for a year. After this additional year’s growing season is over, I take the container out of the greenhouse, and find a home for the plant in a dappled–shade area of the garden, firmly securing the main branch in position with a diagonal cross stake to prevent wind damage to the relatively young root-ball.
12. Using Air Layering for Conservation Purposes:
Air layering is a useful technique that can be used for conservation purposes to propagate a wide range of difficult to root woody plants without resorting to specialised equipment or disturbing the parent plant unduly. The end products have cost you virtually nothing other than a minor investment of your time and a major investment of your patience. Many old rhododendron hybrids are notoriously difficult to root from cuttings, as are some modern hybrids with complex parentages. Similarly, Ghent azaleas can be problematic to propagate. Air-layering presents an easy alternative.
Over the years many of us have had the unfortunate experience of having large plants blown over on to their side by the wind. Sometimes the root-ball is lifted out of the ground, other times the roots are torn out. Either way, this damage presents a problem, particularly if there appears to be little hope of the plant being viable even if a means could be found to return it to the upright position. Providing that the fallen plant does not present a major hazard and that at least some of the roots are still in the ground, or the root-ball can be back-filled with soil, then it is well worth considering air-layering a few of the branches to provide a replacement plant. The technique is also particularly useful for propagating a replacement for an elderly upright plant that looks like it is ‘going back’ and may have a limited number of years ahead of it. In instances of this type it is suggested that three or four air layers are attempted, each on a different branch, so there is an increased chance of a successful result.
In Conclusion:
There is no substitute for getting your hands dirty and gaining some hands-on experience. If you do not have a go you have no opportunity of getting it right first time, second time, or at all. Air-layering is a particularly easy methodology to try your hand at. The cost is almost negligible, just a few basic tools are needed and few ordinary materials that are readily available to most gardeners. It goes without saying that difficult to root plants can be difficult to find at a garden centre or can be costly at a specialist nursery. Many species and older hybrids are no longer commercially available and can be extremely difficult to source, so this air-laying technique is extremely useful for conservation purposes and is now used by horticulturalists and enthusiasts in the U.K. and in many other countries.
© 2014, 2018 & 2020 John M. Hammond
Frequently Asked Questions
smooth barked rhododendrons such as R. thomsonii are notorious for not resprouting when pruned. Do they still root ok with air-layering?
I have air-layered R. thomsonii successfully and I see no reason why other smooth-barked species would not do likewise.
J. Hammond
How old a branch do you think you could get away with when air-layering?
In practice the methodology works for rhododendrons of any age that has branches available up to half an inch thick. Where old rhododendrons are being air-layered I recommend that three or four layers are placed on separate branches as a means of back-up in case one or two don’t take. This is why the methodology is very useful for propagating plants that have blown over in high winds and are problematic to get upright. In these cases, it is important to ‘earth-up the remaining roots.
J. Hammond
Is there a best time of year for air-layering?
Air-layering works best if carried out immediately after the plant has flowered in the Spring, as it then has the whole of the growing season to initiate the rooting process.
J. Hammond
Will a healthy branch on a plant dying from honey fungus or other diseases be ok to use?
The plant referred to above in Item No.1 was dying back, but the methodology was still successful. Two of the branches died during the three years it takes to produce a full set of roots, so two layers were grown on to form robust young plants.
By the time that a plant has been diagnosed as having honey fungus the leaves will have started to droop and to go a yellow colour, so air-layering is not an option.
J. Hammond
